Hey everyone! A few days ago while I was browsing my Twitter (you can follow me @trishamarkrep) I saw a Cosmo tweet about official NFL nail polish, and of course I clicked the link to check out the official nail polish for the MN Vikings! They mentioned the idea of water marbling the 2 shades together, and the picture they showed was so pretty and intriguing that I just had to learn the technique! It took me a couple tries, but I got results that I'm super happy with, and I wanted to share! I used all mark. products for this look, and you can pick the products up at my eBoutique:
http://tmassmann.mymarkstore.com Use promo code WELCOME for free shipping on your first order of any size!
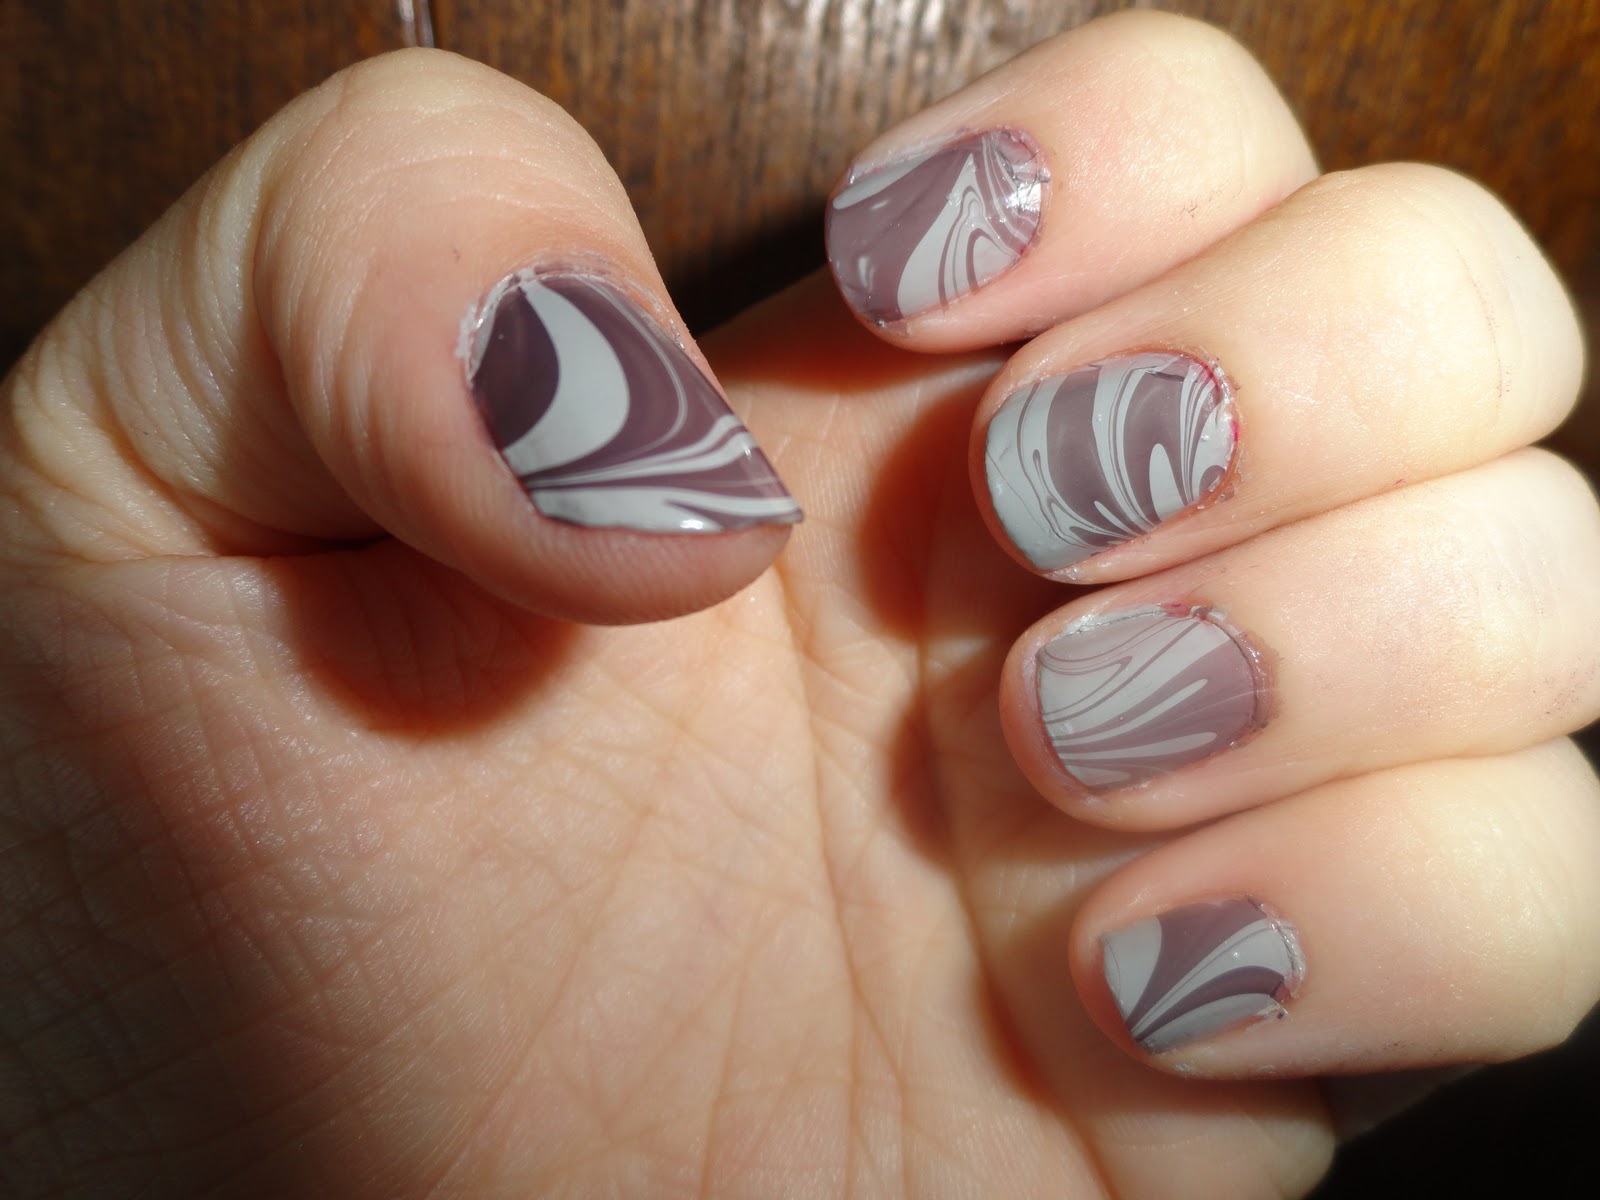
My finished nails!
Supplies:
-2 contrasting nail polish shades (I used mark. Nailed It Trend Mini Lacquers in Steel Plum & Industrial)
-mark. The Big Fix 15-in-1 Benefits Balm
-toothpicks
-paper towels
-shallow dish or bowl of
room temperature water
-nail polish remover, Q-tips, & cotton balls for cleaning your fingers up
Instructions:
Prep your nails by painting on a base coat. I used Industrial, the grey shade.
Use The Big Fix to coat your fingers. Make sure to cover your cuticles and the front & back of your fingers, down to your second knuckle. This helps so that you can wipe the extra nail polish right off your fingers after you dip them. (I've also seen tutorials using clear tape, but that looked a little more time consuming to me). I did just one hand at a time so I could use my other hand for the rest of the steps.
Loosen the covers on both shades of nail polish. Holding the brush about an inch above the surface of the water, let a drop of nail polish fall into the water. I started with the plum shade so that I could see it more easily. If you're doing it correctly, the nail polish should skim across the surface of the water, thinning out and expanding like you see above. If the drop of polish just sinks to the bottom, you might have to hold the brush closer to the surface of the water.
Working quickly, let a drop of the 2nd shade of nail polish fall in the center of the first. It should expand out also. Keep adding drops of alternating colors, making sure to go quickly. If the drop doesn't expand, the outside shade of nail polish might have dried too quickly. I'll explain further down how to clean it up and start over if you need to.
You'll end up with a rough bulls-eye design of nail polish rings. The exact number of rings doesn't matter much, you just want a fairly small inner circle.
Take a toothpick, and starting near the outside, drag the tip of the toothpick toward the middle. If you've ever made a marble cake, it's the same principle. You don't want to start at the very outside edge, because that layer of polish will be too dry and will just cling to the toothpick and pull the whole bulls-eye apart. Usually starting with the 3rd ring of color will work, but if you feel or see it pulling on the toothpick, you'll need to start in a little further.
This was my finished design, and it was big enough that I wanted to dip a few fingers instead of just one. I wasn't able to take a picture of my own hand dipped, but when I did my sisters nails later, I made sure to get a picture:
You can sort of choose the section of the design you like best, by lining your finger nail up with that part of the design. Dip your finger(s) in through the nail polish and try to keep it as still as possible. Make sure your finger is deep enough that your first knuckle is under water. (You can also see in this picture an example of when the 2nd shade doesn't expand - you can see the outline of the purple that I started with, and a tiny dot of grey in the center. I just let another drop of purple fall and tried again)
This picture shows how to get the extra polish out of the water. You do this both when your finger is still dipped to clear away any extra polish so that your finger doesn't drag it up, or when you need to start over if the polish dries too quickly for the next color to expand. Start with the toothpick near the outer edge and swirl it around, twisting as you go, to collect the extra polish.
Didn't get a picture of this next part, but when you take your fingers out of the water, I like to sort of curl my fingers up and out, so that the tip of my finger nail comes out of the water first. That helps keep any leftover polish on your finger instead of gunking up your finger nail.
My fingers after dipping 4 at once. I let it dry just slightly (30 seconds or so) before starting to wipe away the polish on my fingers. Using The Big Fix before dipping your nails makes it easy to wipe most of it away with a paper towel, and then after my nails were fully dry, I used a Q-tip dipped in nail polish remover to clean up closer to my nail. I was happy with the design on my pinky and middle finger, but re-did my ring and index fingers. Make sure to do another base coat and reapply The Big Fix before starting over, and let the base coat dry. (We learned this the hard way when I was trying to go get my sister's nails done at midnight, haha!)
My finished nails, left hand!
And right hand. I think my middle finger on this hand is my favorite!
I had a lot of fun with this technique and have gotten tons of compliments on the results! The one thing I'll make sure to do next time is apply a clear top coat to help the manicure last longer. I hope you enjoyed reading, and I'd love to see pictures if you water marble your own nails! Feel free to comment with questions if there's anything I didn't explain well enough :)


This is fantastic! I can't wait to try this! Oh and btw, I am ALSO a MN Vikings fan ;-)
ReplyDeleteWhoa..I. love it
ReplyDeleteThat is awesome. I've seen some variations on pinterest, but your tutorial looks easy to follow!
ReplyDelete